|
|
|

How to Draw a Husky
ADVERTISEMENT
Home > Cheri Crawford > Husky
|
In this lesson, learn how to draw a Husky! Cheri makes it fun and easy through step-by-step instructions. This husky is the perfect thing to draw for dog lovers! Impress people by following Cheri's directions for a clean and flawless Husky face with such a lively expression. |
Personalize the husky by changing his expression, or adding different colors! If you're up for a bigger challenge, try adding a body or a background! A snowy field or in front of a dog sled would be the perfect scenario for this happy husky!
Get started with how to draw a Husky!
ADVERTISEMENT
This Lesson Teaches:
- Drawing with Shapes
Suggested Drawing Supplies:
- Drawing Paper
- Pencils and Markers for Coloring
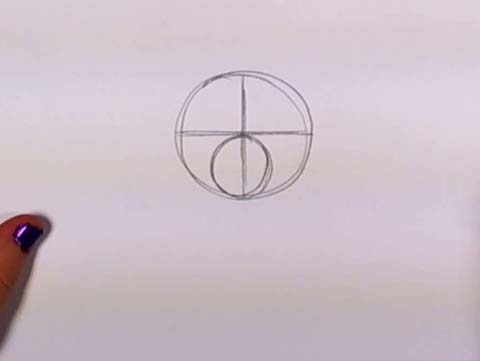
1. Setting the placements
Begin by drawing a circle in the middle of your paper for the husky's head. Then, draw two lines, one horizontal and one vertical, across the circle as placements for the husky's eyes, mouth and nose. Next, draw another smaller circle inside the bottom half of the head, which will act as another placement. Notice how the top of the small circle touches the horizontal placement line.
2. Nose and Chin
For step two, draw a chin at the base of the face, and connect it to the placement circle inside the husky's head.
3. Ears and Eye Placement
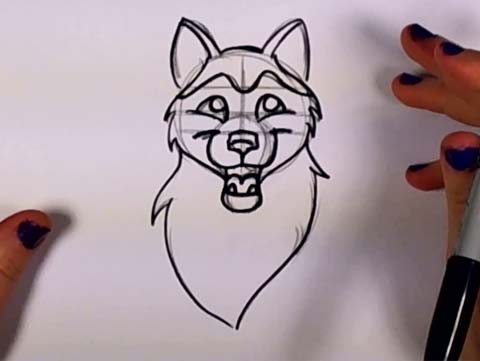
Next, draw two more placement lines-- one near the top of the head for placement of the ears and eyes, and one below the middle line, for the placement of the nose and cheeks. Using the line you just drew as a guide, draw a small nose. Add ears, again using the lines you just drew for a guide.

4. Eyes, Mouth and Cheeks
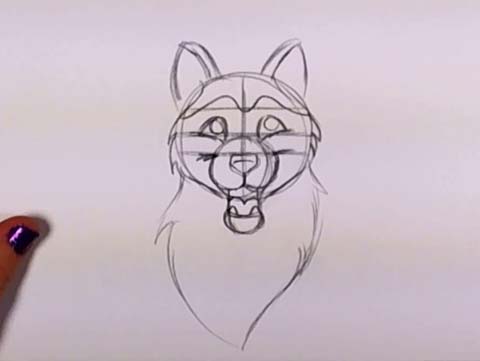
Using the placement lines, draw the husky's cheeks and eyes. Form the mouth, teeth and lips from the chin that you drew in step two. Add two teeth.
5. Fur and Irises
Next, trace around the husky's head with your pencil and add fur. Draw the pupils in the husky's eyes, and add folds to the ears.
6. Neck and Hairline
For step five, draw the husky's neck. Notice how the actual neck is not visible, but only the coat of fur that is around it. This coat should be drawn loosely so that it appears natural. Make sure you add a few places where the fur sticks out. Add a curvy line across the top of the husky's forehead to indicate where the color of the fur changes.
7. Inking
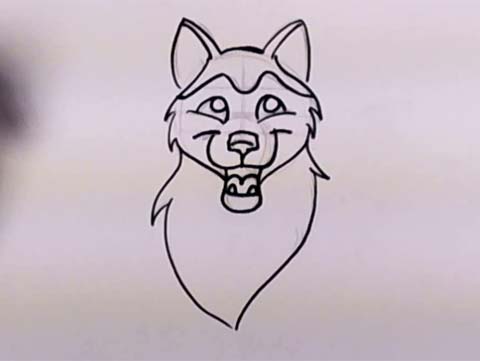
Once you have completed steps 1-5, take a pen or a marker and trace over all of the pencil lines that you want to keep. Notice the places that the lines overlap, such as the mouth, nose, and ears.
9. Erasing
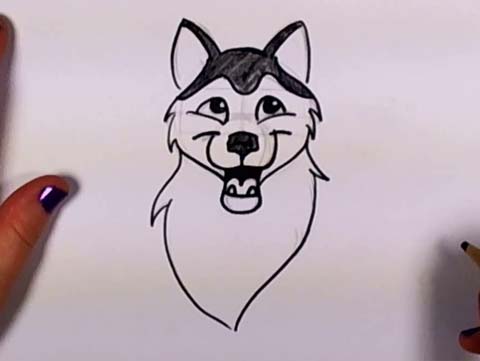
After giving the ink a moment to dry, erase all of the pencil lines! You should be left with a clean image, ready for color.
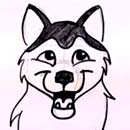
9. Color
The last step is to add some color! With your dark marker or pen, color in the husky's pupils, making sure to leave a tiny shine in the corner. This indicates where the light is hitting the eyes. Color in the top of the hair, the ears, and the nose. Lastly, darken the mouth, avoiding the tongue and teeth, and you are done!
Video Lesson by Cheri Crawford
Watch and follow along as Cheri shows you how she created this awesome husky drawing.
Congratulation! - you have finished the "How to Draw a Husky" online drawing lesson.
Return from How to Draw a Husky to Home




New! Comments
Have your say about our drawing lessons! Leave us a comment in the box below.